All the tools, and so many different ways to get the same result in photoshop can be so overwhelming. Photoshop is a photo editing program that offers endless creativity. As with anything in life, more you practice, the faster and easier it becomes!
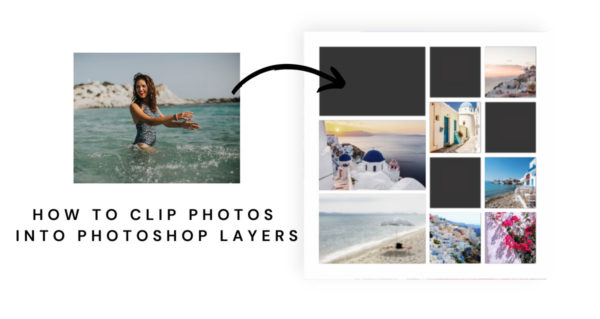
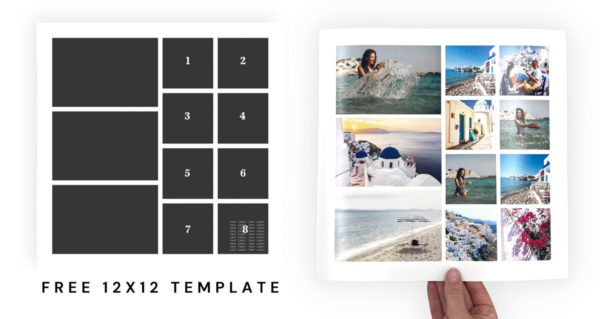
Today we’re going to share a quick and easy tutorial showing how to clip photos in a layered .psd 12×12 template. We’re also providing the template for free!
Let’s get started…
Photoshop Works in Layers
The layered file format is a .psd; for example vacation2022.psd would be a file saved “layered”. Layered files are optimal if you need to go back and make changes at a later time, however keep in mind that this file format is very large and will require more space on your hard drive. I personally save my layered files until I have printed them, then I delete the .psd file.
*don’t forget to save layered (.psd) as you are creating
Flatten Your File
It is important to “flatten” layers once you’re done with the design. This will combine all of the layers you created into one layer. Then hit Save As, change the format from .psd to .jpg. We’ll show you how in the following video.
watch on Vimeo
Upload and Print!
Once you’ve created your 12×12 layout in Photoshop, flatten, save as a .jpg and upload to Persnickety Prints! Like the print above, 12×12 high quality professional prints are only $1.99 each. Don’t let the price fool ya, we’re still using the silver halide Fuji chemical process to ensure the best color and longest lasting print.
Enjoy!